An event table runner is a strip of fabric placed over a bare table or a plain tablecloth to show a logo, brand colours or a printed design. To plan the right size, measure the table's length, depth and height, choose the direction the runner will sit, then add the two hanging drops to the distance across the tabletop. See the custom options from Davis Materialworks.
Planning reference: The measurements, formulas and illustrations below are examples. Your final size, layout, material, printing method and finish may differ. Confirm your project details before production.
1. How do you measure an event table?
Record the table's length × depth × height in millimetres (mm):
- Length: left to right when you face the table.
- Depth: front edge to back edge.
- Height: floor to tabletop.
The examples in this guide use a table measuring 1830 × 750 × 760 mm. These are example dimensions, not a standard size for every event table. If you expect to use an organiser's table, ask for its actual length, depth and height. A label such as “6 ft table” may not give you all three measurements.
2. Which way should the runner sit?
Choose the layout that puts the printed panel where visitors can see it. The two layouts below use different tabletop paths, so calculate the finished length for the one you plan to use.
Front-to-back layout
The runner hangs over the front edge, crosses the tabletop depth and hangs over the back edge. Its visible width is the strip running across the table length. As a starting point, plan a width of about 50% to 70% of the table length. On the example table, that is 915 to 1281 mm. This is the runner width, not the logo width; leave clear space around the artwork.
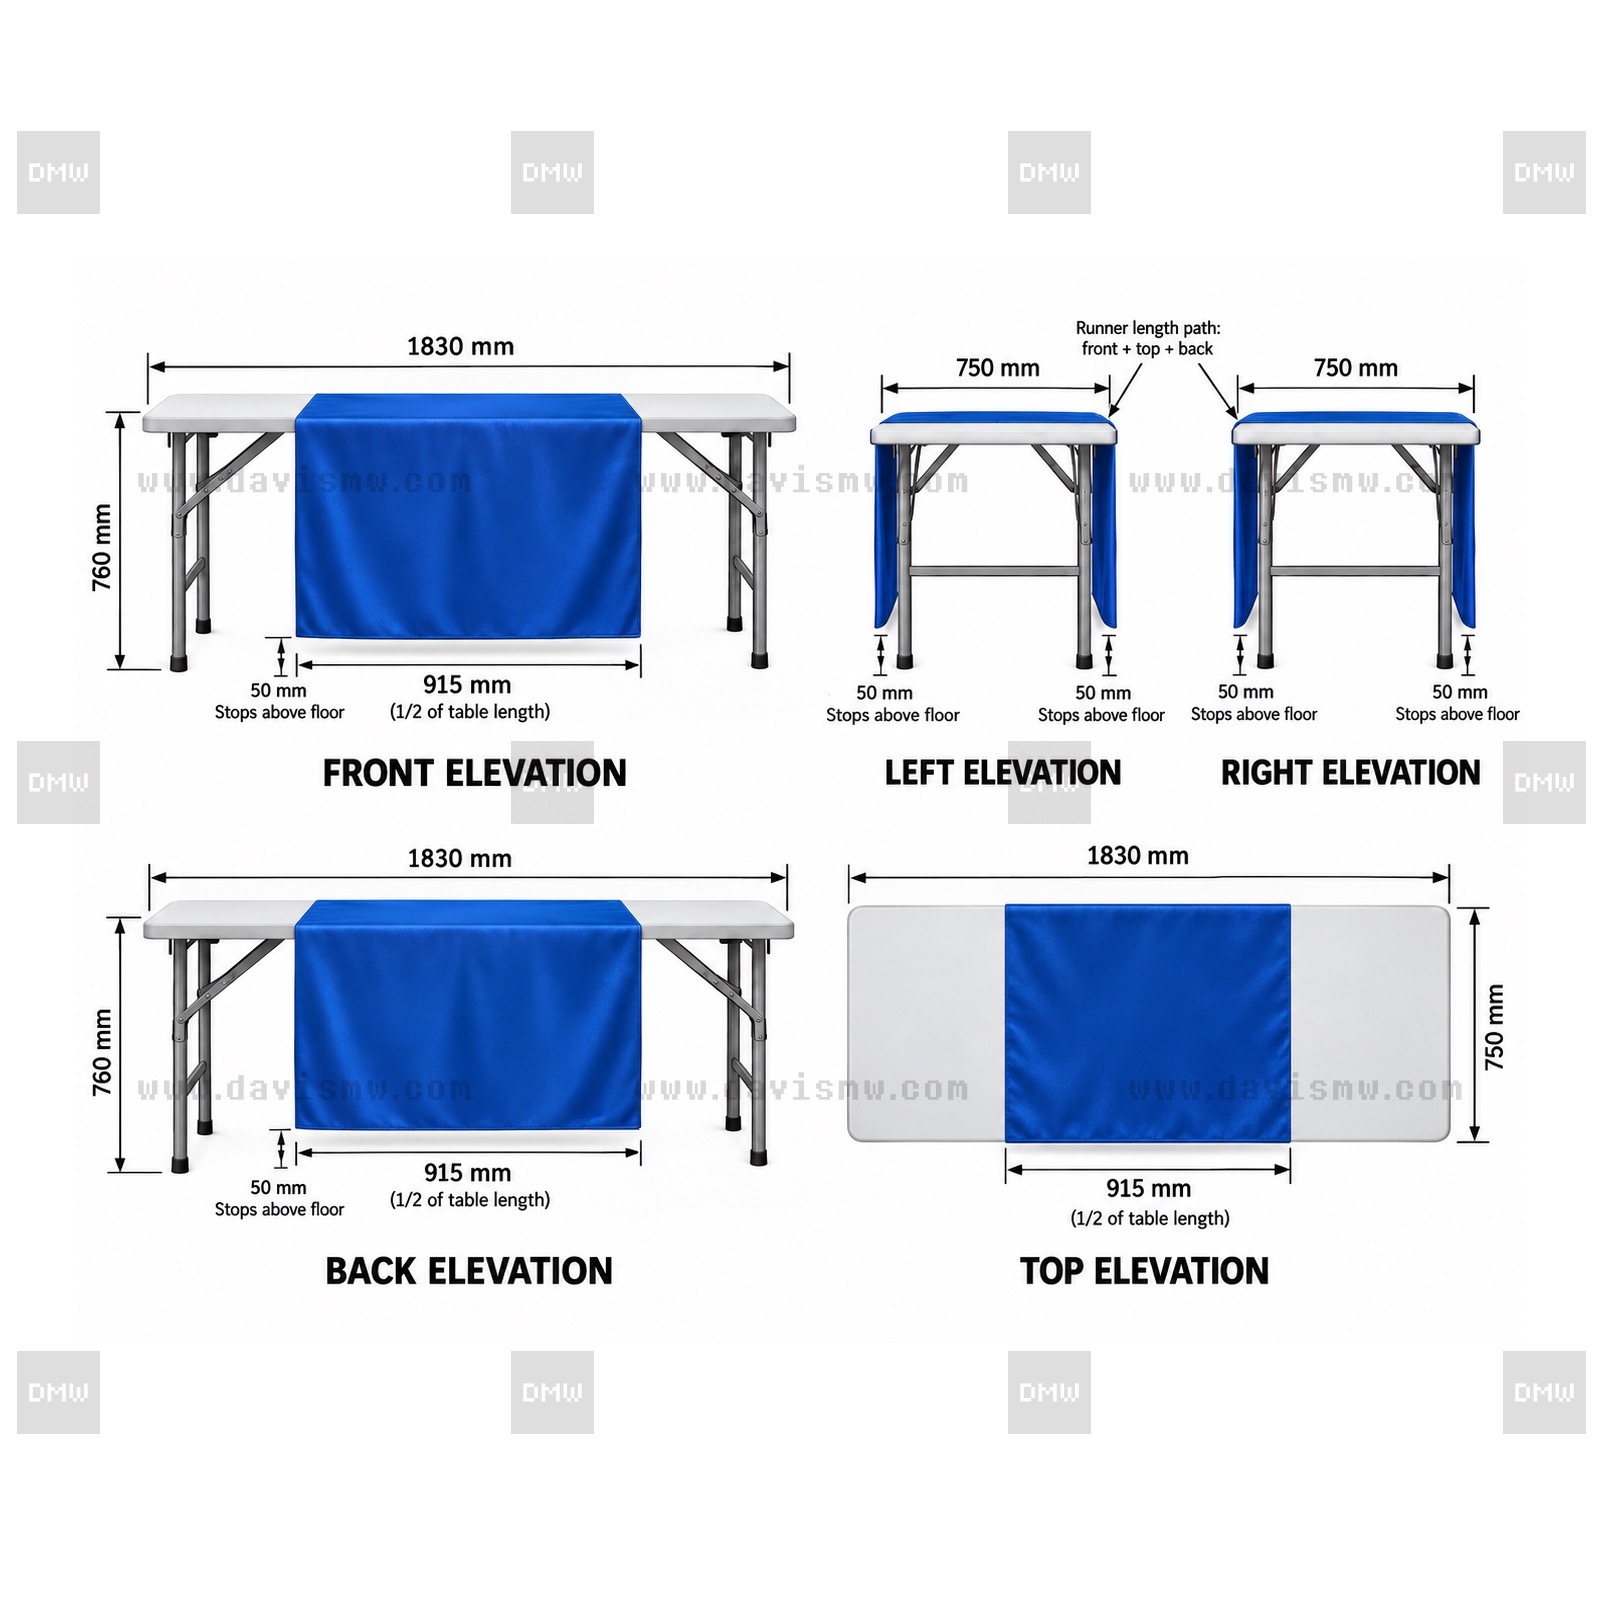
Front-to-back layout on a bare table. The 915 mm runner width is half the illustrated 1830 mm table length. Reference only.
Full-height runner length = table height × 2 + table depth
- Full-height length: 760 × 2 + 750 = 2270 mm.
- With 50 mm clearance above the floor at each end: 2270 − 100 = 2170 mm.
The resulting example planning size is 915 mm wide × 2170 mm long. Confirm hems, allowances and finished production dimensions before ordering.
Left-to-right layout
The runner hangs over the left end, crosses the table length and hangs over the right end. Its hanging panels face the sides, so consider where visitors will approach and whether either side will face a wall or another exhibitor.
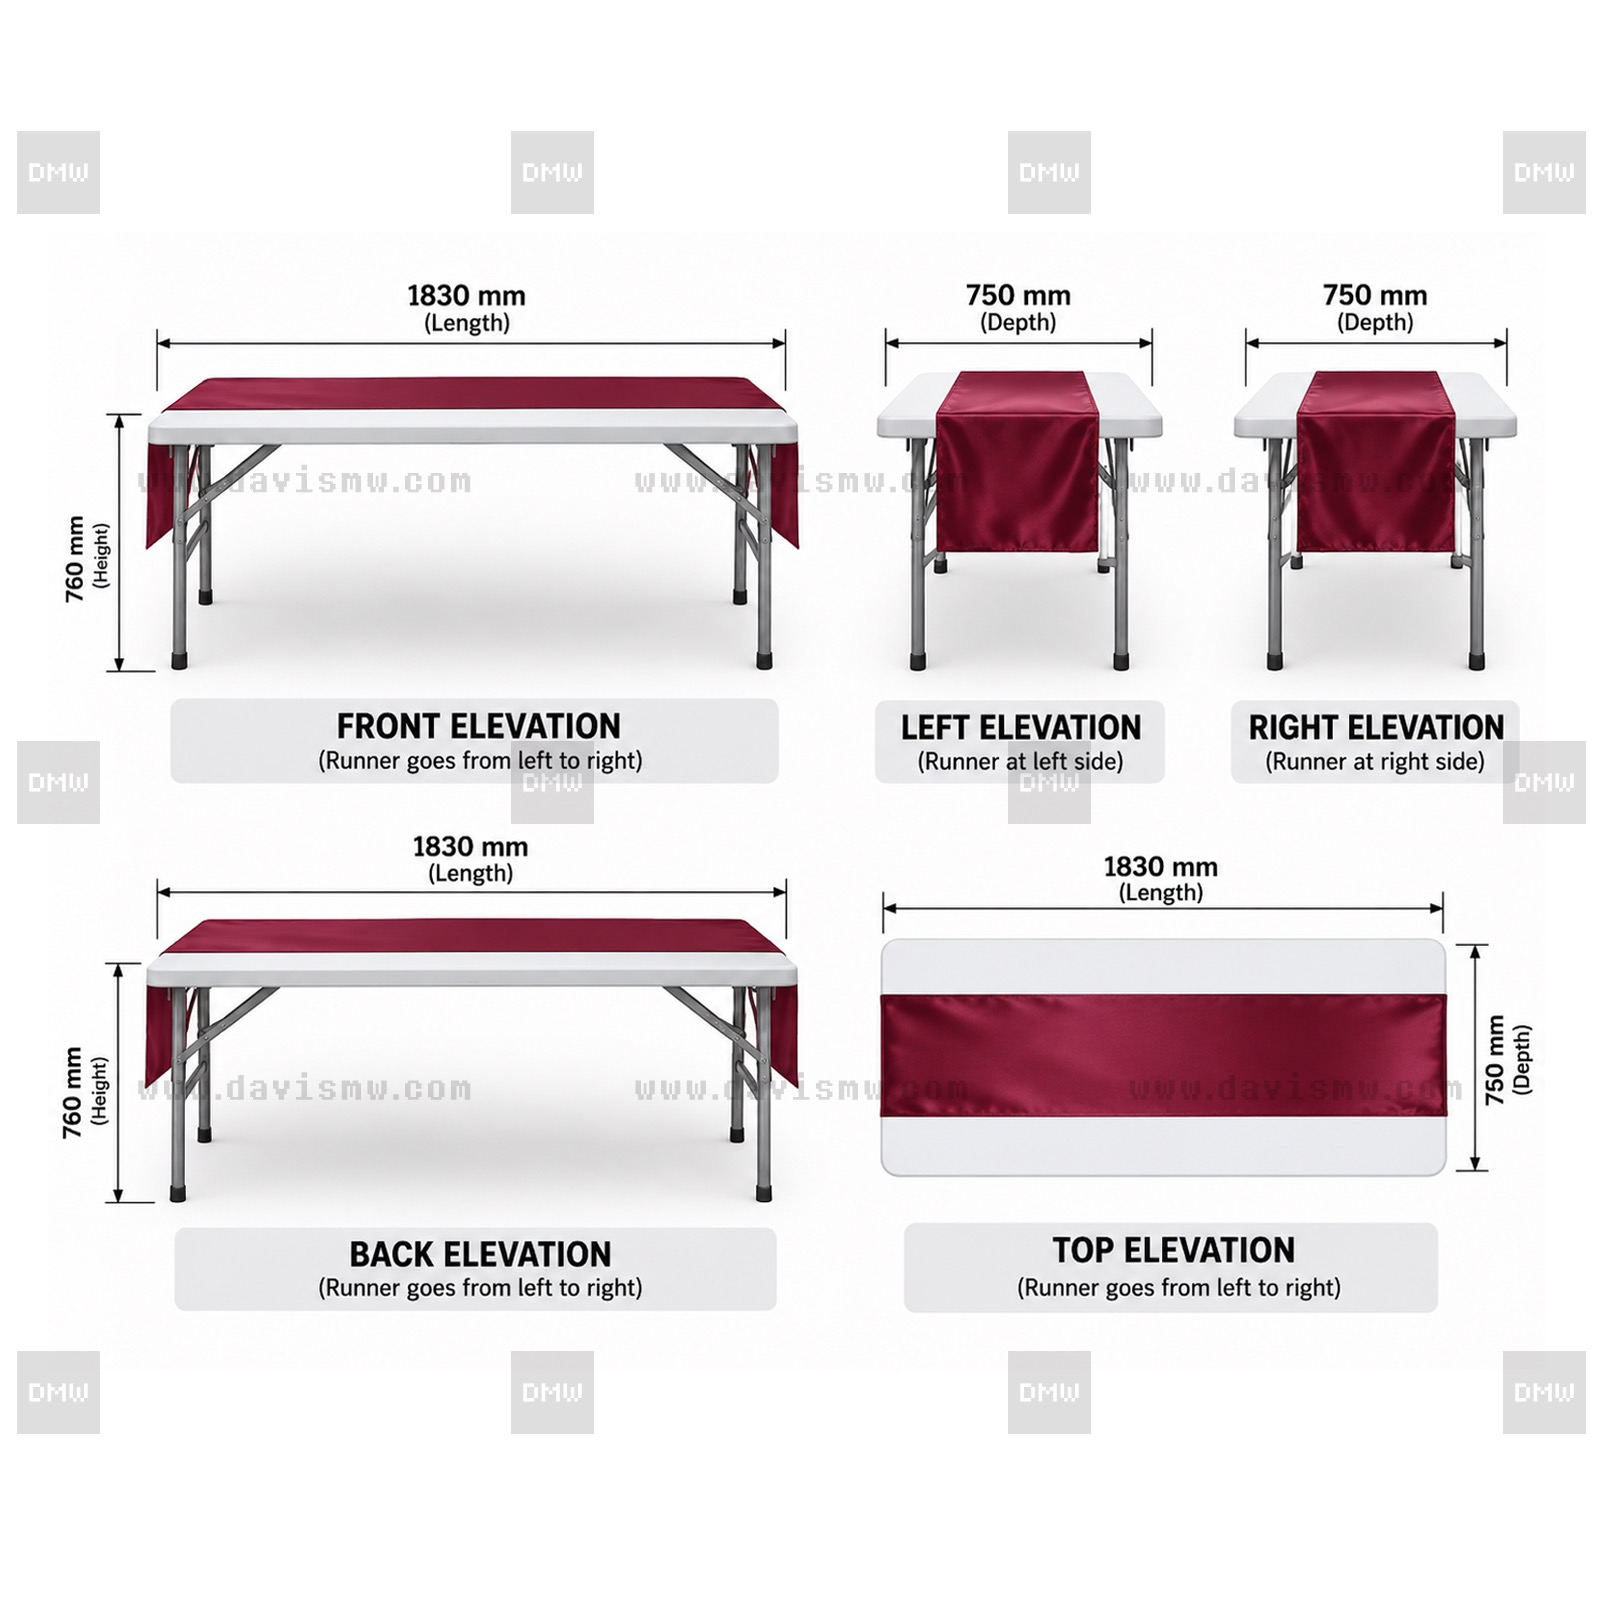
Left-to-right layout. Check whether the side panels face the aisle or are visible to visitors. Reference only.
Full-height runner length = table height × 2 + table length
- Full-height length: 760 × 2 + 1830 = 3350 mm.
- With 50 mm clearance above the floor at each end: 3350 − 100 = 3250 mm.
Choose the runner width to suit the table depth and intended display. The 50% to 70% guideline above applies to the front-facing width of a front-to-back runner; it does not automatically determine the width of a left-to-right runner.
3. How much drop should the runner have?
The drop is the fabric hanging down from the tabletop. A full-height drop is only one option. For either layout, calculate the total length by adding the first drop, the tabletop path and the second drop:
Finished length = first drop + tabletop path + second drop
Decide where each end should stop, then calculate the length. Do not assume a floor-length runner is right for your setup.
4. Choose a budget and purpose
Decide what you need the runner to do: show your brand, give a plain event table a coordinated appearance, or serve across several exhibitions. Set a workable budget for that purpose and confirm the current quote before production.
A runner can contribute to a considered table presentation, but it cannot guarantee enquiries or sales. If you are unsure how you will use it, pause and clarify the event plan before ordering.
5. Choose the colour and material together
Consider the runner alongside the table and any cloth underneath it. Ask the organiser whether a tablecloth is supplied and what colour it will be. A runner can look different against a black cloth than it does on a bare or white table.
Available materials listed for custom event table runners include polyester, tricot fabric, satin, brocade satin, velvet, spandex and a cotton-linen blend. Ask which specific option suits your artwork, printing method, desired drape and plans for reuse. If colour, sheen or feel matters, ask whether a sample is available and confirm the proposed finish.
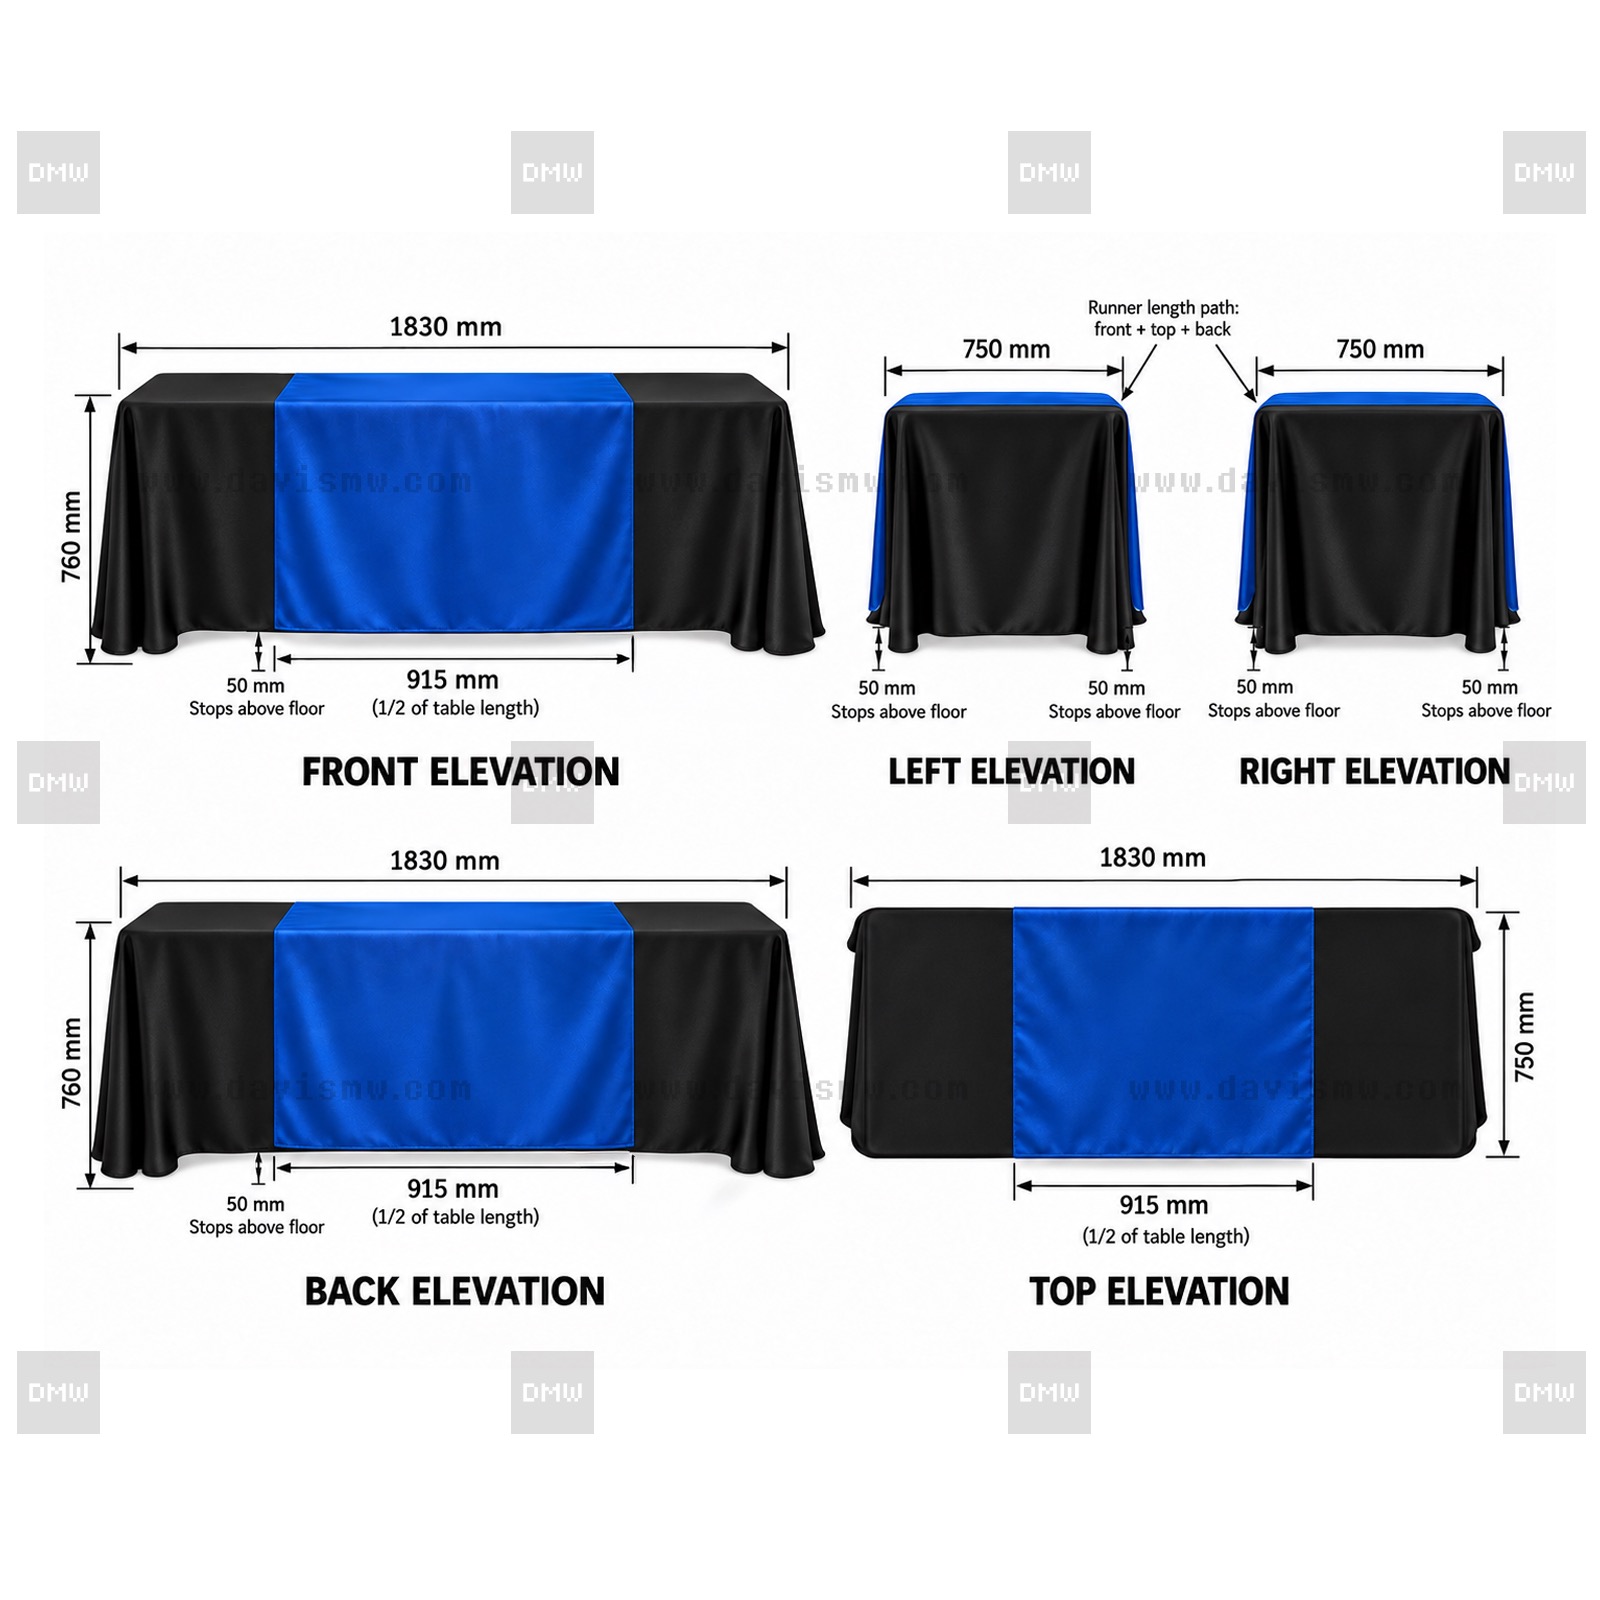
Blue front-to-back runner over a black tablecloth. Compare the appearance with the bare-table example. Reference only.
6. Where should the logo go?
Start with the view your visitors will have. For a front-to-back runner, possible print areas include the front panel, tabletop and back panel. For a left-to-right runner, plan around the tabletop and the two side panels.
Keep the main artwork clear of table edges, folds, seams and hems. Consider what may cover the tabletop, such as brochures, products or display stands, and whether that will obscure the design.
You can plan different artwork for each end and turn the runner around for another event. Check that both designs will be upright when displayed. Printing on both ends on the same face is different from double-sided printing; discuss any double-sided requirement before committing to it.
7. How can you check the setup before ordering?
Use spare cloth or paper to mark the planned width and drop on the actual table. Step back and view it from the aisle to judge the proportions.
Ask for a layout proof showing the runner flat and the artwork positioned on the table. Check the relevant front, back, sides and top views against your measurements. Use the images here as planning references, then approve a proof based on your own table and artwork.
Have these details ready when you enquire
- Table length × depth × height in millimetres, plus other table sizes you use.
- Front-to-back or left-to-right layout.
- Planned runner width, drop and floor clearance.
- Whether a tablecloth will be underneath, and its colour.
- Logo files, brand colours and preferred print positions.
- Preferred material or finish, or a request for advice or samples.
- Quantity, budget, event date and required delivery date.
Before production, confirm the finished dimensions, material, artwork orientation, print positions, price and delivery arrangements. For product details or an enquiry, visit Davis Materialworks.
Final reminder
This article and its illustrations are for planning reference only. Your project may need a different approach. The final agreed specifications and approved artwork for your order take precedence over these examples.